How to Use Cocoa Powder for Cake: The Ultimate Guide
Are you ready to take your cake baking skills to the next level? Look no further than cocoa powder! This magical ingredient not only adds a burst of rich flavor but also gives your cakes a beautiful, deep color that will leave everyone craving for more. Whether you’re a seasoned baker or just starting out, cocoa powder is a versatile ingredient that can elevate any cake recipe. Plus, it’s the perfect complement to powdered sugar for a delectable finishing touch on your baked goods. And if you’re feeling adventurous, why not try making a decadent chocolate gravy using cacao beans? The possibilities are endless with cocoa powder.
But how do you use cocoa powder effectively in your baked goods? That’s what we’re here to explore. From understanding the process of cacao beans to discovering delectable powdered sugar recipes, we’ll uncover all the secrets that will make your cakes stand out from the crowd. So get ready to indulge in the world of chocolatey goodness and create show-stopping desserts that will impress even the toughest food critics. Don’t forget to add a pinch of baking soda for that perfect rise!
Get your mixing bowls ready because we’re about to dive into the wonderful world of using baking chocolate and cacao for cake!
What You Need To Know Before Baking With Cocoa Powder:
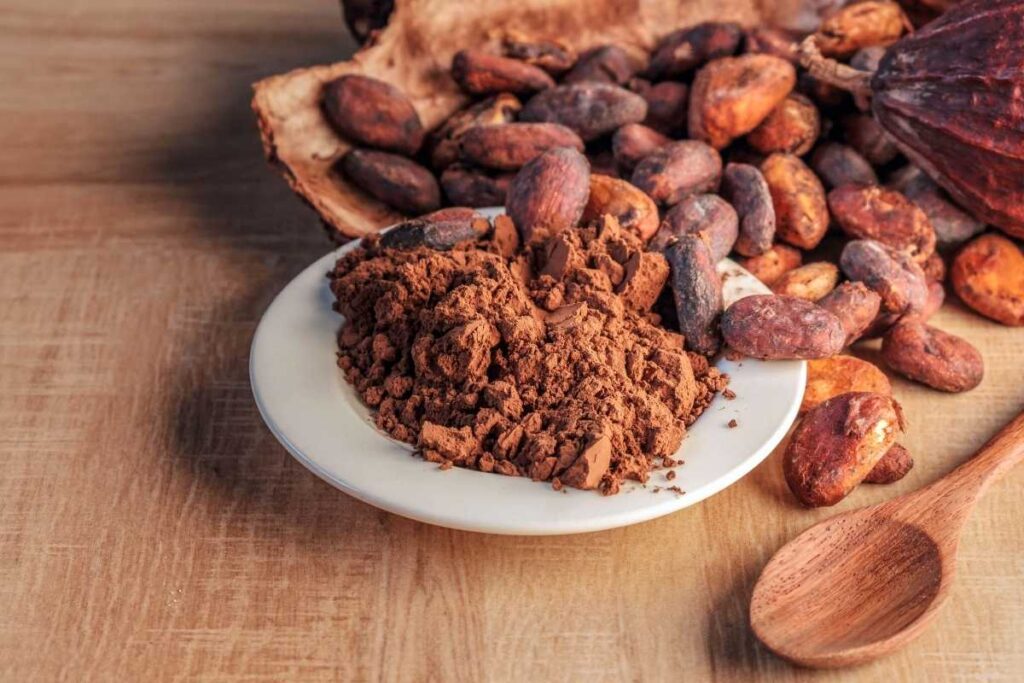
Understand the Different Types of Cocoa Powder
Before you start using cocoa powder or baking chocolate for your cakes and other baked goods, it’s essential to understand the different types available, such as cacao. Here are three common varieties, including chocolate gravy, that you may come across.
- Natural unsweetened: This is the most common type of cocoa powder found in grocery stores. It is made by grinding roasted cocoa beans into a fine powder. Natural unsweetened cocoa powder has a strong, intense flavor and works well in recipes that call for baking soda as a leavening agent.
- Dutch-process: Dutch-process cocoa powder goes through an additional step called Dutching, which involves treating the cocoa beans with an alkaline solution to neutralize their acidity. This process results in a darker color and milder flavor compared to natural unsweetened cocoa powder. Dutch-process cocoa works best with recipes that use baking powder as it doesn’t react with acidic ingredients.
- Black cocoa: Black cocoa powder is heavily Dutched and has an even darker color than Dutch-process cocoa. It has an intense bittersweet taste and is often used in recipes where a deep chocolate flavor is desired, such as Oreos or dark chocolate cakes.
Choose High-Quality Cocoa Powder
To achieve the best results in your cake baking endeavors, it’s crucial to choose a high-quality cocoa powder recipe. Look for brands that specialize in producing premium dutch process cocoa products and have a good reputation among bakers. Opting for quality ensures that your cakes will have a rich chocolate flavor without any unwanted bitterness. Additionally, selecting a cocoa powder with a low fat percent is important for achieving the desired texture and taste in your cakes.
How to Use Cocoa Powder for Cake | The Importance of Sifting Cocoa Powder
Sifting your dutch process cocoa powder before incorporating it into your cake batter can make a significant difference in the final product. Here’s why sifting matters: it helps ensure an even distribution of fat and improves the overall texture of the recipe.
- Removing lumps: Cocoa powder tends to clump together due to its fine texture and exposure to moisture. Sifting helps break up these lumps, ensuring a smooth and consistent texture in your cake batter.
- Aerating the powder: Sifting cocoa powder introduces air into the mix, which can contribute to a lighter and fluffier cake. This aeration process helps create a more tender crumb and enhances the overall baking experience.
- Blending with other dry ingredients: Sifting cocoa powder along with other dry ingredients like flour, baking powder, and salt ensures their even distribution throughout the batter. This uniform blending leads to better flavor integration and consistent results.
To sift dutch process cocoa powder effectively for a chocolate cake recipe, use a fine-mesh sieve or sifter and gently tap it over a bowl to allow the powder to pass through while removing any lumps.
By understanding the different types of cocoa powders available, such as dutch process, selecting high-quality options to reduce fat content, and incorporating proper sifting techniques into your baking routine, you’ll be well on your way to creating deliciously chocolatey cakes using this recipe that will impress everyone who takes a bite.
Understanding Different Types of Cocoa Powder: Natural Unsweetened, Dutch-Process, and Black Cocoa
Natural Unsweetened Cocoa Powder
Natural unsweetened cocoa powder, made from grinding roasted cocoa beans, is a staple ingredient in many baking recipes. This type of cocoa powder, with its strong chocolate flavor and acidity, adds brightness to baked goods and balances the sweetness of other ingredients. It is often used in conjunction with cake flour and fat in Dutch baking.
When making a cake recipe, it’s important to remember that natural unsweetened cocoa powder can be intense in flavor and high in fat. To prevent overpowering delicate flavors, consider using a combination of natural unsweetened cocoa powder and another milder variety in your recipe.
Dutch-Process Cocoa Powder
Dutch-process cocoa powder is created by treating natural unsweetened cocoa with an alkali solution to neutralize its acidity. This fat recipe process results in a milder flavor compared to natural unsweetened cocoa powder. The alkalization also gives it a darker color.
The reduced acidity of Dutch-process cacao powder makes it ideal for recipes where you want a more balanced chocolate taste without the sharpness. It works well in cakes, cookies, and brownies, adding depth and richness to the final product. Additionally, adding espresso powder can enhance the overall flavor profile of these baked goods.
Black Cocoa Powder
Black cocoa powder is known for its intensely dark color and deep chocolatey taste. It undergoes additional processing to remove most of the cocoa butter from the roasted beans before grinding them into a fine powder. This process yields a highly concentrated flavor that adds an extra punch to your baked goods.
Because black cocoa has such an intense flavor profile, it’s often used in small amounts or combined with other types of cocoa powders for balance. It pairs exceptionally well with rich desserts like chocolate fudge cake or brownies.
To summarize:
Natural Unsweetened Cocoa Powder:
- Strong chocolate flavor
- Acidic taste
- Brightens baked goods
Dutch-Process Cocoa Powder:
- Milder flavor
- Reduced acidity
- Adds depth and richness
Black Cocoa Powder:
- Intensely dark color
- Deep chocolatey taste
- Concentrated flavor profile
Experimenting with different types of cocoa powder can elevate your baking to new heights. By understanding the characteristics of natural unsweetened, Dutch-process, and black cocoa powders, you can choose the right one for your cake recipes based on the desired flavor profile. Whether you prefer a classic chocolate taste or a more intense experience, these cocoa powders offer a range of options to suit your preferences.
So go ahead and explore the world of cocoa powders! Mix and match them in your cakes to create delightful treats that will impress both friends and family. Happy baking!
Substituting Flour with Cocoa Powder: Tips and Recipes:
Creative Ways to Substitute Flour with Cocoa Powder in Cake Recipes
Looking for a unique twist to your cake recipes? Why not experiment with substituting flour with cocoa powder? Not only does it add a rich chocolate flavor, but it can also open up a world of gluten-free options. Here are some creative ways to incorporate cocoa powder into your cakes:
- Replace a portion of the cake flour with cocoa powder: By substituting around 25% of the cake flour with cocoa powder, you can infuse your cakes with a delightful chocolatey taste. This works particularly well in recipes that call for lighter and fluffier textures.
- Go all-in with flourless chocolate cakes: If you’re looking for an indulgent treat, why not try making a flourless chocolate cake? These decadent delights rely solely on cocoa powder as their base ingredient. With no flour involved, these cakes offer a dense and fudgy texture that will leave your taste buds craving more.
- Use cocoa powder as a coating or dusting: Instead of using regular flour to coat your baking pans or dust the top of your cakes, try using cocoa powder instead. It adds an extra layer of flavor while preventing sticking and enhancing the visual appeal of your creations.
Discover Gluten-Free Options by Replacing Some or All of the Flour
For those following a gluten-free diet or simply looking for alternatives to traditional wheat-based flours, substituting some or all of the flour in your cake recipes with cocoa powder can be an excellent choice. Here’s how you can achieve gluten-free goodness:
- Mix cocoa powder with alternative gluten-free flours: Create your own blend by combining cocoa powder with almond flour, coconut flour, or oat flour. Experimenting with different ratios will allow you to find the perfect balance between chocolaty goodness and desired texture.
- Opt for pre-made gluten-free flour blends: If you prefer convenience, there are numerous gluten-free flour blends available in the market. Look for ones that include cocoa powder as an ingredient to ensure a rich chocolatey taste.
- Explore alternative ingredients: Cocoa powder can be combined with other gluten-free ingredients like ground nuts, mashed bananas, or even black beans to create moist and flavorful cakes without relying on traditional flours.
Try Out Delicious Flourless Chocolate Cake Recipes
Flourless chocolate cakes are a real treat for chocolate lovers. These recipes showcase the intense flavor of cocoa powder while providing a dense and velvety texture. Here’s a simple recipe to get you started:
- Preheat your oven to 350°F (175°C) and grease a round cake pan for baking delicious treats with dutched cocoa powder, dutch cocoa powder, and espresso powder. Explore a variety of cocoa powder recipes that will satisfy your cravings.
- In a heatproof bowl, melt 8 ounces of dark chocolate and 1 cup of unsalted butter to make a hot cocoa mix.
- Once melted, remove from heat and whisk in 1 cup of granulated sugar until well combined. This step is essential when making hot cocoa mix, hot chocolate powder, cocoa powder recipes, or dutched cocoa powder.
- Add 6 large eggs, one at a time, beating well after each addition to your hot cocoa mix or cocoa powder recipes.
Mastering the Use of Cocoa Powder in Cake Batter: Mixing Wet and Dry Ingredients
Incorporating Cocoa Powder for Even Distribution
Mastering the use of cocoa powder is essential. To ensure an even distribution of cocoa flavor throughout your cake batter, it’s important to properly incorporate the cocoa powder. Here are some tips to help you achieve that:
- Sift the Cocoa Powder: Before adding cocoa powder to your dry ingredients, sift it first. This step helps break up any lumps and ensures a smoother texture in your cake batter.
- Mix with Dry Ingredients: Once sifted, combine the cocoa powder with your other dry ingredients such as flour, sugar, and leavening agents. Mixing them together before adding any liquids will help distribute the cocoa evenly.
- Whisk or Stir Thoroughly: Use a whisk or spoon to thoroughly mix all the dry ingredients together until well combined. Make sure there are no visible clumps of cocoa powder remaining.
Alternating Wet and Dry Ingredients
Incorporating cocoa powder into your cake batter requires careful consideration of how you add both wet and dry ingredients. The alternating method helps create a smooth and well-blended batter:
- Begin with Dry Ingredients: Start by adding about one-third of your combined dry ingredients (including the cocoa powder) into your mixing bowl.
- Add Liquid Ingredients: Next, pour in about half of your liquid ingredients (such as milk, oil, or melted butter) for your cocoa powder recipes. This moisture will help hydrate the dry mixture when making hot cocoa using either Dutch cocoa powder or natural cocoa powder.
- Repeat Layers: Continue alternating between adding the dry ingredients, such as cocoa mix and dutch process cocoa powder, and the liquid ingredients until everything is incorporated into the batter. Remember to end with the final portion of dry ingredients, which may include cacao powder or dutched cocoa powder.
- Mix Gently: When combining each addition, mix gently but thoroughly using a spatula or electric mixer on low speed. Avoid overmixing as this can lead to a dense texture in your cake. Whether you’re using dutched cocoa powder, natural cocoa powder, dutch process cocoa powder, or red cocoa powder, remember to mix gently to achieve the best results.
Achieving Smooth, Lump-Free Batter
To achieve a smooth and lump-free batter when using cocoa powder, there are specific mixing techniques you should follow:
- Scrape the Bowl: As you mix the ingredients together, periodically scrape down the sides and bottom of the bowl. This ensures that all the cocoa powder is fully incorporated into the batter.
- Avoid Overmixing: Overmixing can lead to gluten development, resulting in a tough cake. Mix just until all the ingredients, including natural cocoa powder, dutched cocoa powder, dutch process cocoa powder, and black cocoa powder, are combined and no streaks of dry or wet batter remain.
- Use Room Temperature Ingredients: Using room temperature eggs, milk, and butter will help create a smoother batter for your cake. Cold ingredients can cause lumps to form in your cake mixture, so it’s important to use natural cocoa powder, dutched cocoa powder, dutch process cocoa, or black cocoa powder when preparing your batter.
- Check for Lumps: Before pouring your batter into the cake pans, check for any remaining lumps of cocoa powder or dry ingredients. Break them up with a spoon or whisk until smooth.
By following these tips and techniques, you’ll be able to master the use of cocoa powder in your cake batter. Your cakes will have an even distribution of rich chocolate flavor throughout every slice!
Perfecting Your Cocoa Cake Recipe: Step-by-step Instructions:
Creating a Moist and Flavorful Cocoa Cake from Scratch
If you’re looking to whip up a delicious cocoa cake from scratch, follow these step-by-step instructions to achieve a moist and flavorful finished dish. With the right techniques and ingredients, you’ll be able to create a chocolatey masterpiece that will impress your friends and family.
- Gather Your Ingredients
- Start by collecting all the necessary ingredients listed in your chosen chocolate cake recipe, including cocoa mix, natural cocoa, dutched cocoa powder, and black cocoa powder.
- Ensure you have high-quality cocoa powder on hand for the best flavor. Processed cocoa powders like Hershey‘s or Ghirardelli work well for most recipes.
- If you prefer a more intense chocolate taste, consider using dark cocoa powder or even adding some cacao nibs to the batter.
- Adjust Sweetness Levels
- Different types of cocoa powders can vary in sweetness levels. To adjust the sweetness of your cake, consider:
- Using less sugar if your cocoa powder is already sweetened.
- Adding extra sugar if you’re using unsweetened cocoa powder.
- Balancing the sweetness by incorporating caramel sauce or powdered sugar glaze as toppings is a great way to enhance the flavor of desserts made with both dutched cocoa and natural cocoa.
- Different types of cocoa powders can vary in sweetness levels. To adjust the sweetness of your cake, consider:
- Experiment with Enhancements
- While cocoa powder alone provides an amazing chocolate flavor, don’t be afraid to experiment with additional ingredients to enhance it further:
- Add a shot of espresso or strong coffee to intensify the richness of the natural cocoa and red cocoa powder.
- Incorporate spices like cinnamon or nutmeg for a touch of warmth and complexity.
- Mix in crushed cookies, chopped nuts, or chocolate chips for added texture.
- While cocoa powder alone provides an amazing chocolate flavor, don’t be afraid to experiment with additional ingredients to enhance it further:
- Follow the Recipe Steps
- Preheat your oven according to the recipe instructions.
- Grease and flour your baking pan(s) to prevent sticking.
- Combine dry ingredients (including cocoa powder) in one bowl and wet ingredients in another.
- Gradually mix the dry ingredients into the wet ones until well combined, being careful not to overmix.
- Pour the batter into your prepared pan(s) and smooth the top with a spatula.
- Bake for the recommended time or until a toothpick inserted into the center comes out clean.
- Allow the cake(s) to cool completely before frosting or serving.
By following these steps, you’ll be able to create a delectable cocoa cake from scratch that will satisfy any chocolate lover’s cravings. Remember to experiment with different variations and toppings to find your perfect cocoa cake recipe!
Now that you have all the tools and tips at your disposal, it’s time to get baking! So put on your apron, preheat that oven, and let’s make some mouthwatering cocoa cake magic!
Best Practices for Storing Cocoa Powder and Finished Cocoa Cakes
Store cocoa powder in a cool, dark place
Proper storage is key. To ensure that your cocoa powder remains fresh and flavorful, store it in a cool, dark place. This will help prevent exposure to heat and light, which can cause the cocoa powder to deteriorate.
Keep finished cocoa cakes fresh
Once you’ve baked your delicious cocoa cake, it’s important to store it properly to maintain its freshness. The best way to do this is by storing the finished cake in an airtight container at room temperature. This will help preserve its moisture and prevent it from drying out.
Learn how to properly freeze cocoa cakes
If you want to extend the shelf life of your cocoa cakes, freezing them is a great option. Here’s how you can do it:
- Allow the cake to cool completely before freezing.
- Wrap the cake tightly with plastic wrap or aluminum foil.
- Place the wrapped cake in an airtight container or freezer bag.
- Label the container with the date of freezing.
- Put the container in the freezer.
By following these steps, you can ensure that your frozen cocoa cakes stay fresh for several months.
Additional Tips for Storage
- If you live in a hot and humid climate, consider storing your cocoa powder and finished cakes in the fridge instead of at room temperature.
- When storing cocoa powder in an airtight container, make sure there are no lingering odors inside as they can affect its flavor.
- Avoid storing cocoa powder near strong-smelling ingredients like spices or garlic as they can transfer their flavors onto the powder.
- For added protection against moisture, consider placing a desiccant packet inside the container with your stored cocoa powder.
Remember that proper storage practices not only help maintain the quality of your cocoa powder and finished cakes but also ensure that they taste their best when used in recipes. By following these guidelines, you can enjoy the rich and decadent flavors of cocoa in your cakes for a longer period of time.
So, next time you bake a cocoa cake, remember to store your cocoa powder in a cool, dark place, keep the finished cake in an airtight container at room temperature, or freeze it following the steps provided. These simple practices will help you make the most out of your cocoa powder and ensure that your cakes stay fresh and delicious.
Elevate Your Baking Skills with Cocoa Powder:
In conclusion, mastering the art of using cocoa powder for cake can take your baking skills to new heights. By understanding the basics before diving into the process, you can ensure that your cocoa-infused creations turn out perfectly every time.
Different types of cocoa powder offer distinct flavors and characteristics. Natural unsweetened, Dutch-process, and black cocoa each have their own unique qualities that can enhance your cakes in different ways. Experimenting with these varieties will allow you to discover the perfect fit for your taste preferences.
Substituting flour with cocoa powder opens up a world of possibilities. Not only does it add a rich chocolatey flavor, but it also contributes to the moistness and texture of the cake. With some tips and recipes, you can confidently replace flour with cocoa powder in your favorite recipes or try new ones.
When incorporating cocoa powder into cake batter, it’s important to understand how to properly mix wet and dry ingredients. Following specific techniques ensures an even distribution of flavor throughout the batter and prevents lumps or clumps from forming.
To perfect your cocoa cake recipe, step-by-step instructions are essential. From measuring ingredients accurately to preheating the oven at the right temperature, paying attention to details will help you achieve a deliciously moist and decadent treat.
Proper storage of both cocoa powder and finished cocoa cakes is crucial for maintaining their freshness and quality. By following best practices such as storing in airtight containers away from direct sunlight or moisture, you can enjoy rich chocolatey goodness for longer periods.
So why wait? Take your baking skills to new heights by harnessing the power of cocoa powder in your cakes. Experiment with different types, substitute flour creatively, master mixing techniques, follow step-by-step instructions diligently, and store your creations properly for lasting enjoyment.
Now go forth and create delectable chocolate masterpieces that will impress friends, family, and even yourself. Happy baking!
FAQs:
Q: Can I use any type of cocoa powder for baking cakes?
A: While you can use different types of cocoa powder, it’s important to understand their characteristics and how they may affect the flavor and texture of your cake. Experimenting with natural unsweetened, Dutch-process, and black cocoa will allow you to find the perfect fit for your desired outcome.
Q: Can I substitute flour entirely with cocoa powder in a cake recipe?
A: Yes, you can substitute flour with cocoa powder in a cake recipe. However, it’s crucial to consider the impact on the texture and structure of the cake. Adjustments may be necessary to ensure proper rising and moisture balance.
Q: How do I mix wet and dry ingredients when using cocoa powder in cake batter?
A: To achieve a smooth batter when incorporating cocoa powder, it’s best to mix the dry ingredients separately before gradually adding them to the wet ingredients. This ensures an even distribution of flavor throughout the batter.
Q: Are there any specific storage requirements for cocoa powder?
A: To maintain freshness, store cocoa powder in an airtight container away from direct sunlight or moisture. This will help preserve its flavor and prevent clumping.
Q: How long can I store a finished cocoa cake?
A: When properly stored in an airtight container at room temperature or refrigerated, a finished cocoa cake can typically be enjoyed for up to 3-4 days. However, it is best consumed within the first few days for optimal taste and freshness.